Senin, 28 April 2014

Painted Rose Cookies for Mother's Day

Painted Rose cookies for Mother's Day... painted rose decorated cookies ... perfect for Mother's Day
Cookie inspiration really is EVERYWHERE!  Seriously, look to your right.  That thing right there?  That could be a cookie.
(I so hope you're not blog reading in the bathroom.)

Invitations are great jumping off points for cookie design ideas.  Lately, I've been enamored with Swanky Press invitations.  Our school ordered invites for our fundraiser from them (so cute!), and ever since, I keep popping over to their site for cookie ideas.

painted rose decorated cookies ... perfect for Mother's Day
I fell in love with the rose garland on this bridal shower invitation and thought it would be just perfect for Mother's Day.  {Note to my boys: Mother's Day is approaching!}

painted rose decorated cookies ... perfect for Mother's Day
Don't worry, you need ZERO artistic skill to make these.  You'll basically be painting cloud-shaped blobs on your cookies.  If I can do it, so can YOU!


To make painted rose cookies, you'll need:


Start by icing your cookies with a base coat of white icing.  Outline the cookies with a #2 tip.

Thin the icing with water, a bit at a time, stirring with a silicone spatula, until it is the consistency of a thick syrup.  You'll want to drop a "ribbon" of icing back into the bowl and have it disappear in a count of "one thousand one, one thousand two." Four is too thick, one is too thin.  Count of 2-3 is good.  Cover with a damp dishcloth and let sit for several minutes.

Stir gently with a silicone spatula to pop and large air bubbles that have formed.  Pour into a squeeze bottle. 

Fill in the outlines with the thinned icing, using a toothpick to guide to the edges and to pop large air bubbles.

Let the cookies dry, uncovered, 6-8 hours or overnight.

how to paint on cookies
Once the cookies are completely dry, gather your supplies for painting: paintbrushes, palette, paper towels, food coloring, water, and food coloring pen.

I find it easier to start with the "Mom" in the center, then add the flowers.  You could use a paintbrush for this, but I think a food coloring pen is the perfect tool here.

how to paint on cookies
Next, mix food coloring with water in approximately equal amounts on your palette.  Dip the brushes into the mixture, then blot well on paper towels before painting on the cookies.

painted rose decorated cookies ... perfect for Mother's Day, inspired by @swankypress invitations
The roses really are just little cloud shapes.  With the soft pink food coloring, I filled in the shape, and then added detail with the electric pink.  For the electric pink roses, I left them with white centers.

Add the leaves and garland in green.
painted rose decorated cookies ... perfect for Mother's Day
Give the cookies about 30 minutes to dry completely. 

On a totally weird, exciting, how-did-this-happen note...this Thursday morning, I'll be drinking...no wait, I'll be cooking/baking with with Ree and Maria and these two.  YEP.

Excuse me while I pass out.  I'll be the one hiding behind Ree.
painted rose decorated cookies ... perfect for Mother's Day


Sabtu, 26 April 2014

Sweet on Trader Joe's Saturdays: Chocolate Ganache Torte

trader joe's chocolate ganache torte review

We're getting fancy with our Trader Joe's dessert review today.  May we present...

Trader Joe's Handmade Chocolate Ganache Torte


Trader Joe's describes this as "rich chocolate mousse between two layers of moist chocolate cake glazed with semi-sweet chocolate ganache."  This is sounding good already.
trader joe's chocolate ganache torte review
You'll find this baby in the freezer section of TJ's...it's $7.99 for a 1 pound 12 ounce torte.  Pretty hefty.  The package says that it serves 8, but it's so rich, you could definitely get 10 servings out of it.  (And, I'm not one for skimpy desserts.) ;)

trader joe's chocolate ganache torte review
My Take: Sinfully rich, the cake layers remind me of those dense and delicious flourless chocolate cakes.  The mousse layer is substantial and really creamy.  I was impressed with how pretty it looked out of the box considering how many times I'd turned the box upside-down looking at the back label. Since this is kept in the freezer, I think this torte would be perfect to stash away for unexpected company.  Use a stencil over the top and sprinkle on some cocoa powder?  Voila!  Instant fancy.
Overall rating: 4 of 5 stars

Kiddo's Take: This is SO RICH! The mousse is very, very, very decadent and creamy. There is so much chocolate in this torte it's almost hard to believe it's possible. Not so much that it will make you sick, though! :)
4.5 out of 5 stars
trader joe's chocolate ganache torte review


Trader Joe's Handmade Chocolate Ganache Torte: keep one stashed in your freezer! 
trader joe's chocolate ganache torte review

Rabu, 23 April 2014

Yes in my Mess.

homemade hostess cupcakes to celebrate @wearethatfamily new book! (recipe & giveaway)

Kristen and I met over Hostess cupcakes.

OK, not really.  Our family moved in next door to hers.  Two introverted moms who said hello in the yard...we had boys who, despite their age difference, hit it off.

One day, Kristen's son was over playing LEGOS with kiddo and the boys came into the kitchen....just as I was contorted into some awkward position taking pictures of...cupcakes.
(Looking back at those pictures now makes me cringe, and I was *really* trying!  Ugh.)

I was embarrassed they'd caught me taking pictures of food.  What would he say when he got home?  "Mom, Mrs. Edwards made cupcakes and before offering us one, was lining them up on a tray, bending over at a weird angle, moving them around, and taking pictures of them."

Instead, her son walked right up and said, "do you have a blog?"

And, that's how I knew I was living next door to THAT family...We are THAT Family.

homemade hostess cupcakes to celebrate @wearethatfamily new book! (recipe & giveaway)
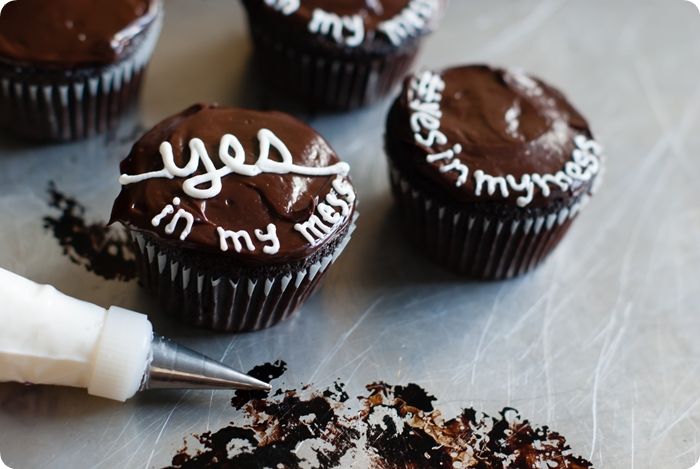
Kristen and her family have become friends, and truthfully, inspirations to our family.  They've since moved to a new neighborhood, but we still think of them as our neighbors to this day.

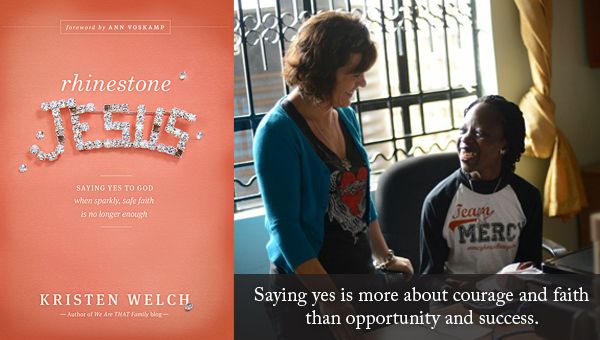
A few years ago, Kristen had a life-changing experience.  She traveled to Kenya and witnessed the poverty, hunger, and devastation there.  She also heard a call.  A call to do something.  She and her family have answered that calling in a beautiful way...opening Mercy House Kenya

Rhinestone Jesus by Kristen Welch
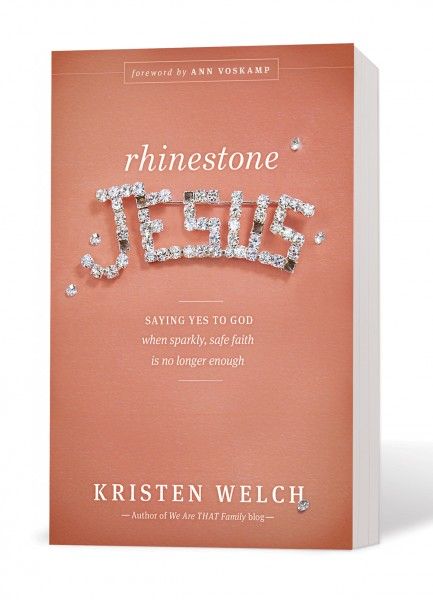
In Kristen's new book, Rhinestone Jesus, she tells her story.  It all starts with a Rhinestone Jesus pin she wore to high school, and well, the story continues to this day.

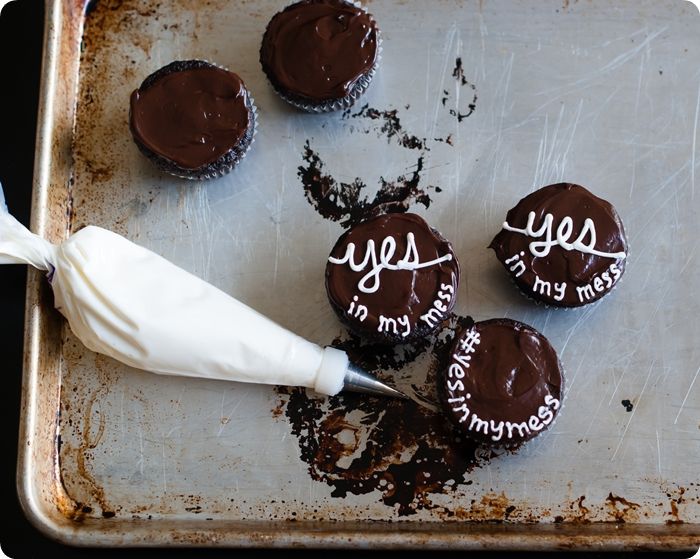
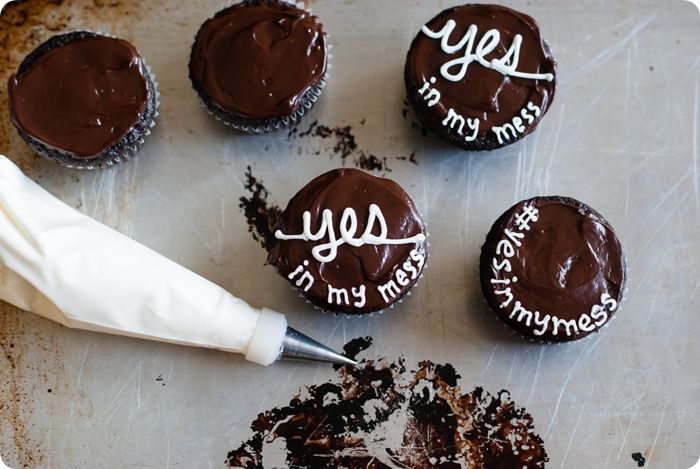
Kristen said, "Yes" to her call.  Did she have millions stashed away to give?  Did she know exactly how to start a non-profit?  Was her life in perfect order and everything in place?  No.  Kristen said yes, as she puts it, in her mess.  #yesinmymess

rhinestone jesus quote

One of my favorite passages in the book is this one:
  
"We often don't do anything because we think our contribution won't be enough.  Or we convince ourselves that we must do something great for it to be important.  We don't act because we lack confidence.  We convince ourselves that our contribution couldn't possibly matter."


So, whether you're being called to start a maternity home in Africa...or you're making dinners for new moms in your parish like another Kristen I know, or you're fostering and adopting a child like my friend, Karen, or you're ministering to people by feeding and entertaining them in your home like Sandy, or you volunteer tirelessly at your child's school like my friend, Melissa...Rhinestone Jesus encourages us to say "yes" in our own mess.

{If you'd like an opportunity to win a copy of the book, please scroll down past the recipe.}

homemade hostess cupcakes to celebrate @wearethatfamily new book! (recipe & giveaway)

print recipe photo printrecipe.jpg

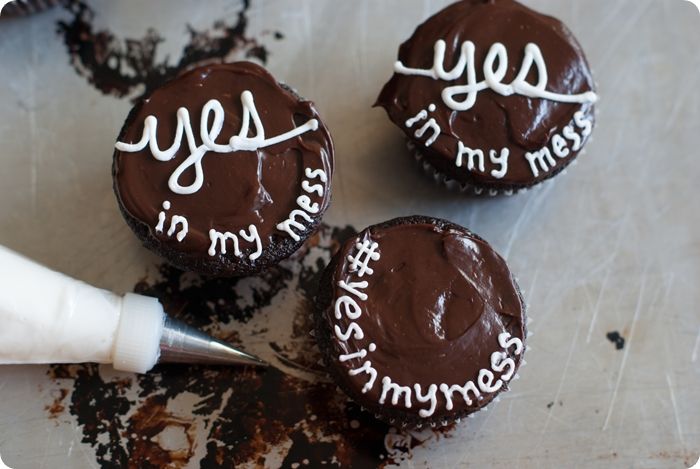
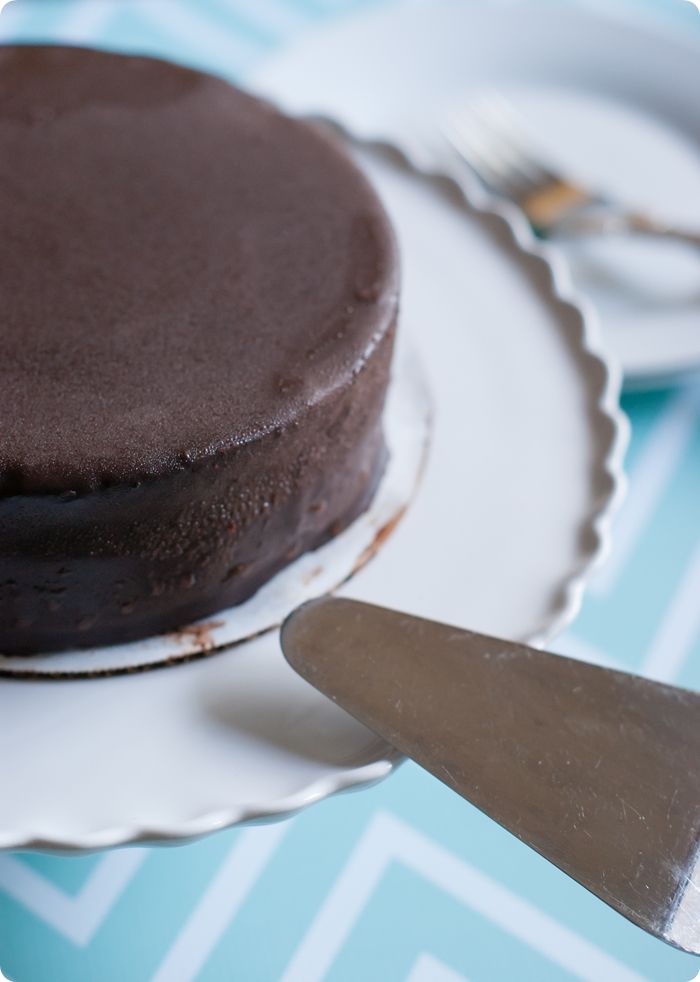
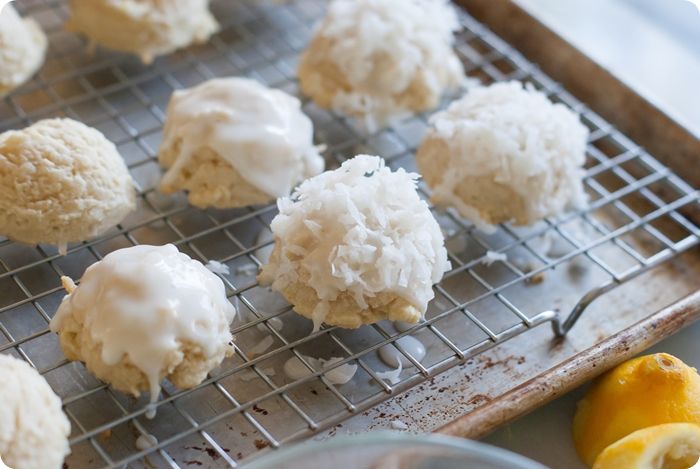
Homemade Hostess Cupcakes

(adapted from Food Network magazine, makes 20)


For the Cupcakes
1 & 1/4 cups sugar
1 cup water
4 ounces unsweetened chocolate, chopped
1 stick (1/2 cup) unsalted butter, cut into pieces
2 teaspoons pure vanilla extract
2 large eggs
1 & 1/4 cups unbleached, all-purpose flour
2 teaspoons baking soda
2 teaspoons baking powder
1/4 teaspoon coarse salt

For the Filling
4 tablespoons unsalted butter, at room temperature
1 cup powdered sugar
2 teaspoons pure vanilla extract
3 tablespoons heavy cream
1 cup marshmallow creme

For the Ganache
6 ounces bittersweet chocolate, chopped
1/2 cup heavy cream
1 tablespoon unsalted butter
2 teaspoons pure vanilla extract

For the Icing
1 stick unsalted butter
1 & 1/2 - 2 tablespoons milk
2 cups powdered sugar
white food coloring (optional)


Preheat oven to 350. Line a muffin tin with cupcake liners for about 20 cupcakes.

For the cupcakes: Bring the sugar and 1 cup water to a boil in a saucepan, stirring occasionally until the sugar dissolves. Place the chocolate and butter in a large bowl of an electric mixer, pour the sugar syrup on top.  Let sit, stirring occasionally, until the chocolate is melted and the mixture has cooled slightly. Stir in the vanilla.

Beat the eggs into the chocolate.

Sift together the flour, baking soda, baking powder and salt into the batter.  Mix until thickened and combined.


Divide the batter evenly between the prepared pans (about 1/4 cup batter per cupcake) and bake until a toothpick inserted in the center comes out clean, about 25 minutes. Cool in the pans for about 10 minutes, then transfer cupcakes to a rack to cool completely.

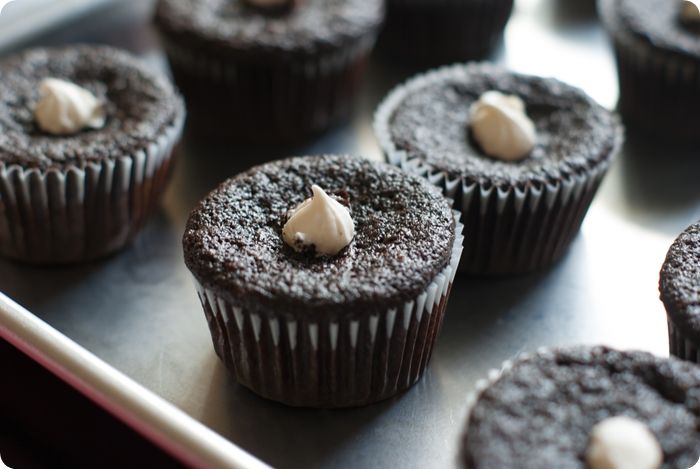
(They will sink in the middle...they'll puff up when filled later.)
For the filling: Using a mixer, cream the butter until light and fluffy. Beat in 1/2 cup powdered sugar. Add the vanilla and 1 tablespoon heavy cream; beat until smooth. Beat in the remaining 1/2 cup powdered sugar and 2 tablespoons heavy cream. Beat in the marshmallow creme; set aside or refrigerate.

For the ganache: Place the chocolate in a bowl. Heat the cream and 1 tablespoon butter until just boiling, then pour over the chocolate; let stand for 5 minutes. Stir gently until smooth. Add 2 teaspoons vanilla; and stir.  Let stand until cool but still glossy and liquid.

homemade hostess cupcakes to celebrate @wearethatfamily new book! (recipe & giveaway)
Assembly:  Spoon the filling into a pastry bag with a medium star tip. Insert the tip into the center of each cupcake top; fill until the cupcake is heavier and the top puffs up (do not overfill). (It's OK if some of the filling peeks out, it will be covered by the ganache.  Feel free to scrape the excess off.)

Spoon a little cooled ganache on each cupcake and lightly spread with an offset spatula or a knife. Chill for at least 15 minutes.

homemade hostess cupcakes to celebrate @wearethatfamily new book! (recipe & giveaway)Meanwhile, prepare the icing: Using a mixer, beat the butter until fluffy. Mix in the milk and powdered sugar until smooth, adding more milk if needed.  Tint white by mixing in white food coloring (optional...the icing will be an ecru color without it, but look very light against the dark chocolate). Spoon into a pastry bag with a small plain tip, such as a #2 or #1, pipe onto the cupcakes to decorate.

Store in the refrigerator.

Rhinestone Jesus by Kristen Welch
Kristen's book, Rhinestone Jesus, is available starting May 1 at many retailers and is available NOW on Amazon.  If you'd like to be entered to win a copy here, please leave a comment letting me know how you say "yes in your mess"....or how you'd like to start. ♥

{Entries accepted through 11:59pm CST, April 27th.}
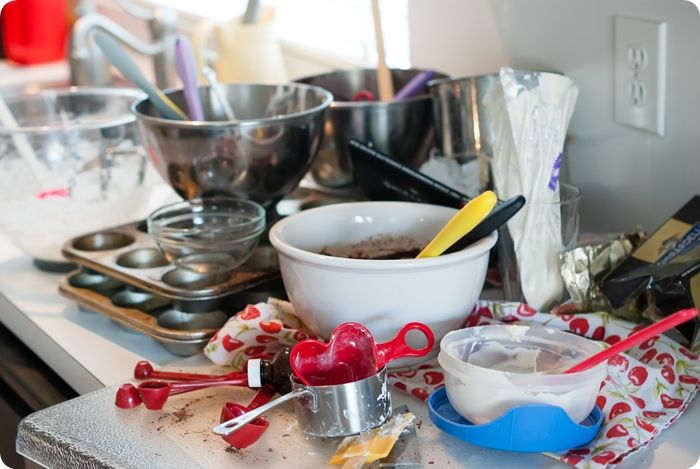
yes in my mess kitchen photo yesinmymess8of9.jpg
{my mess.} 

Senin, 21 April 2014

You Say It's Your Birthday...popcorn.

birthday cake popcorn ... made with birthday cake m&ms
If birthday cake-flavored everything is wrong, then I don't want to be right.

birthday cake m&ms !!!
It all started with these.  Laurel posted a picture of a bag she'd picked up at the airport on Instagram.  Where to find birthday cake M&Ms...that was the question. The hunt for them commenced.  I am now known as the weird lady who walks past each and EVERY check-out aisle in the grocery store...all 20-something of them...scanning each and every candy display.

Luckily, there's this little thing called the Internet.  I found out that these Birthday Cake M&Ms aren't due in stores until May, but CVS stores ended up with them on the shelves early.  Bingo.

That same day, I was walking through Joann Fabrics and BOOM!  Hello, birthday cake-flavored candy melts...
birthday cake candy melts & recipe for birthday cake popcorn
...that's what we call fate. 

let's make some birthday cake popcorn!
All I needed was popcorn and sprinkles, and I had the makings of Birthday Cake Popcorn. 

Crunchy, sweet, with a hint of salt...you'll think it's your birthday when you make it.

print recipe photo printrecipe.jpg

Birthday Cake Popcorn


1 batch stove-popped popcorn (from 1/2 cup unpopped)
2 TBSP salted butter, melted
pinch kosher salt
1 bag birthday cake-flavored candy melts
2 (8-oz) bags birthday cake M&Ms (you'll use 1.5 bags)
sprinkles

Start with your freshly-popped popcorn.  (If you need a refresher on how to do this on the stove, click here.)  Spread the popcorn out on a large rimmed baking sheet.

let's make some birthday cake popcorn!
Pour the melted butter over the popcorn and toss.
{Can we talk for a minute about how much I love that little dot of melted butter?  Ok, thanks.}

Sprinkle on a big pinch of kosher salt.  Toss again. (During all this tossing, discard any unpopped kernels you might see.)

birthday cake popcorn melts photo birthdaycakepopcorn4of8.jpg
Melt the candy melts according to the package instructions.  I use the microwave option.  Pour the melted candy melts over the popcorn, then toss to coat all of the popcorn.

I love my "Salad Hands" for this job.  I actually use these things all the time.

birthday cake popcorn mix photo birthdaycakepopcorn5of8.jpg
While the candy melts are still melted, toss in the M&Ms and the sprinkles.

birthday cake popcorn mixed mess photo birthdaycakepopcorn6of8.jpg
Now is the time to taste.  If you think it needs a bit more salt, add some more kosher or finely ground sea salt.

Spread the popcorn onto two cookie sheets and let the candy melts harden.  Break into clusters and serve or package.

birthday cake popcorn ... made with birthday cake m&ms

I highly suggest bagging it up and getting it out of your house as soon as possible.  On the other hand, popcorn is a very good source of fiber and whole grains.  Hmmm...


Jumat, 18 April 2014

Sweet on Trader Joe's Saturdays: Butter Almond Thins

Welcome to the 2nd installment of our Sweet on Trader Joe's Saturdays!

This week, kiddo & I review one of his most requested TJ's sweets: the Belgian Butter Almond Thins.
trader joe's butter almond thins review
Trader Joe's describes these as "all-butter traditional Belgian biscuits."  They run $2.79 for a 7.05 ounce box...approximately 8 servings per box.

The cookies are very thin and delicate, crispy, and definitely buttery.

trader joe's butter almond thins review
My Take:  OK...I love that these have 6 ingredients and no artificial flavors, colors, or preservatives.  That said, though, these aren't my favorite.  They're good, but not my cup of tea.  If you're a shortbread cookie lover or love those "butter cookies" in the tins at Christmastime, you might really enjoy these, though.  I, on the other hand, was tempted to slather them with Nutella.  
Overall rating: 3 of 5 stars


Kiddo's Take: I don't know what world she's in, but these are delicious. Their thinness makes it feel like they melt in your mouth, and the almond flavor comes out very strong, leaving you with a sweet and enjoyable aftertaste. (Caution: I could eat an entire box of these in 5 minutes, so be careful.)
Overall rating: 5 out of 5 stars

trader joe's butter almond thins review

Trader Joe's Belgian Butter Almond Thins: split decision!


Rabu, 16 April 2014

Bunny Silhouette Cookies ... and a special guest!

Hey guys! You're in for a treat because my friend Lupita is sharing a cookie tutorial with us today!  You've met Lupita before...I just love her cookies!  She has been posting the prettiest Easter cookies on her blog lately, and I kind of begged her to share one here. ;) 

I know you'll want to see all of her Easter creations...like these speckled eggs where she baked the cookies AND the icing!!!  These little lambs, sweet bunnies...and oh my gosh...these Faberge Egg cookies!

{Lupita's blog is written mainly in Spanish.  Follow the picture tutorials, or do what I do (no thanks to 4 years of high school Spanish), use Google Translate.  Just pop the URL into the translate box and Google will translate the ENTIRE post for you.  So cool!}

Alright...here's Lupita!  Y'all give her a warm welcome!


We are just few days away from Easter, I hope you are already preparing to celebrate this big feast. 


Easter cookie table centerpiece


I love to decorate my table with cookies as you may imagine and I am always looking for practical ideas or ways to multitask my cookies, and I will share with you how to make a silhouette cookie that if you personalize it it can be a place card for your Easter table. 


Easter cookie table


It is really easy to make and it will add a cute touch to your table. 

You will need...

*  Your favorite cookie dough (click here for my favorite)
*  Square cookie cutter
*  Rabbit cookie cutter
*  Royal icing medium and flooding consistency
*  2 Pastry bag, couplers and decorating tip #2
*  Americolor food gel in Turquoise and Black
*  Edible black marker


PROCEDURE:

1) Bake a square cookie and let it cool, prepare a pastry bag with medium consistency white royal icing and tip # 2.


2) Trace the bunny in the center of your cookie using your marker,  outline the border of the rabbit  and the border of the square with white royal icing. 


3)  Prepare flooding icing in light turquoise to fill up  the square and black for the bunny.


4)  Flood the square with turquoise royal icing and let it dry for 6-8 hrs.


5)  When the turquoise icing is dry, flood the bunny with black icing and let it dry completely. 


6)  Prepare some firm medium consistency royal icing in  black and fill up a pastry bag and with tip # 2 make some little dots all around the cookie. 


7)  You can write down the name of each guest on the cookie or just add a little detail that represent each of your guest,for example, you can add some pearls to the Mother Bunny, or some glasses to the Granpa Bunny, or a bow to the Sister Bunny.


What I like the most of decorating cookies is that you have endless posibilites to make your own creations. 

Happy Easter Everyone!!


post signature

Minggu, 13 April 2014

From boy crushes to cookie crushes...

lemon coconut cottontail cookies
I was the girl who *always* had a "crush" on a boy.  ALWAYS.  I think it started about 5th grade and went all the way through college.  I'm not sure why I had these crushes...none of them ever paid me any attention. 

Can I tell you an embarrassing story about one of my crushes...and you promise you won't tell?  Ok, good.  In 7th grade, my crush, Andy, asked another girl in band to "go with" him.  ("Go with"...that's what we called it in the olden days.)

Anyway...I was so, so heartbroken. 
lemon coconut cottontail cookies
(Now,  at this point in the story, please keep in mind that these were the olden days like I mentioned earlier with no caller ID.)
I came home from school that day, called his house, and when he answered the phone...

...when he answered the phone...

...I set the needle down on my Grease album (vinyl: olden days), and played Hopelessly Devoted to You to him over the phone.  And, then hung up.

Yep.  I did.

lemon coconut cottontail cookies
Happily for everyone involved, crushes on boys have morphed into crushes on cookies.  It's kind of like school all over again...a new crush every week or so...but without the heartache.

lemon coconut cottontail cookies

My crush this week is this recipe for Lemon Coconut Cottontail Cookies.  They're TOTALLY crush-worthy.  And, they love when you belt out Hopelessly Devoted to You...they don't even find it creepy whatsoever.


lemon coconut cottontail cookies
Seriously, these little sweeties are *perfect* for your Easter dessert table.  Soft, citrus-y, and oh-so-pretty. 

Promise me you'll eat one warm...then bathe the rest in the lemon glaze and cover with sweetened coconut.

lemon coconut cottontail cookies
I'm sharing this recipe over at Imperial Sugar.

chocolate bunny sandwich cookies with marshmallow buttercream
Guys!  Also, let me tell you about these Chocolate Sandwich Bunny Cookies with Marshmallow Buttercream that are also over at Imperial Sugar.  You may have seen these in their Easter ads recently.  I was thrilled to be able to create the recipe and then they were photographed for the ad by talented Heidi of FoodieCrushClick here for the recipe...there's also a how-to video! (Yikes!)

*And, please tell me I'm not the only one with an embarrassing "crush" story...or two.*