Whether you call them donuts or doughnuts or the extra inch on your waistline...donuts can't help but make you smile. Or, make ME smile, and I think we're kindred spirits here.
Let's talk donuts for a minute. When I was a kid, I could never understand when my mom said she "didn't like donuts." More precisely, she only ate cake donuts. She also fell asleep during Star Wars. Neither one of these things made any sense to me as a kid; now, I TOTALLY GET IT.
I would never, ever grab a glazed donut out of a box. Eww. They get slimy and squishy....but a CAKE donut? Oh baby. Sign me up. I don't care if it's plain, chocolate, blueberry, pumpkin, topped with coconut, sprinkled with nuts, frosted, or rolled in cinnamon sugar.
I love me some cake donuts. My exception to this rule is the
Shipley Do-Nuts Chocolate Frosting Filled. Yes, it's glazed, but it's filled with FROSTING!!! It's pretty much heaven on Earth.
Is this weird to be so particular about donuts? Well, here's something I think we all can agree on:
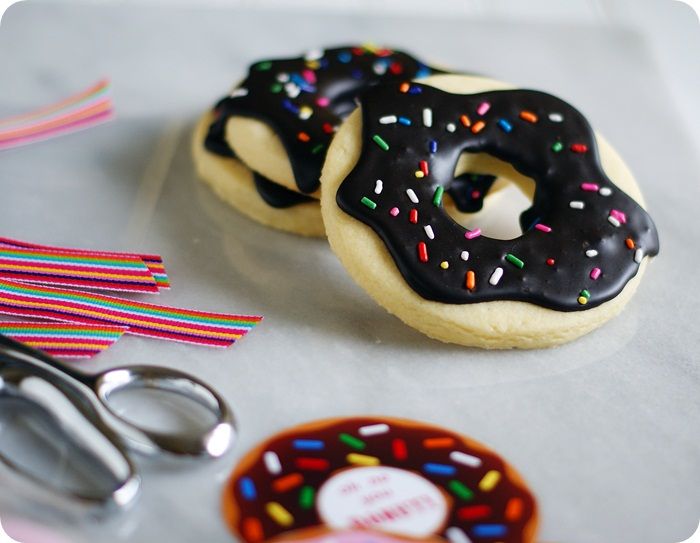
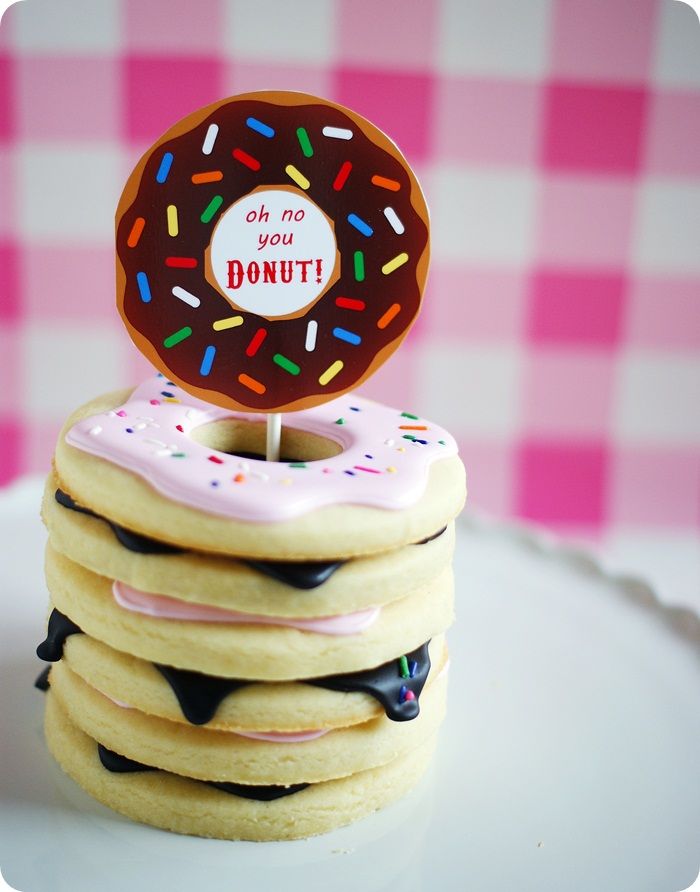
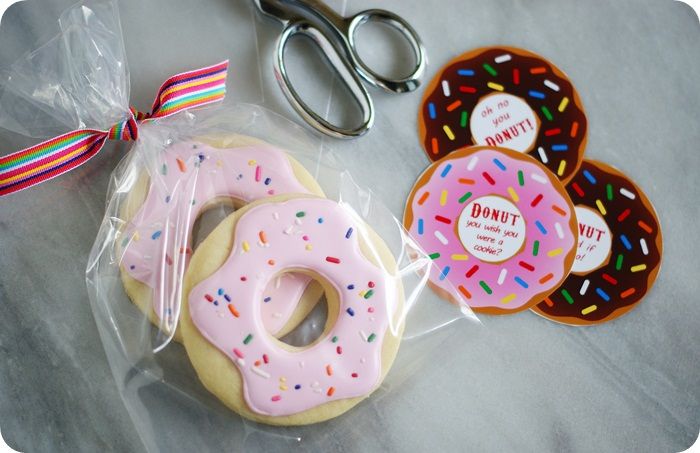
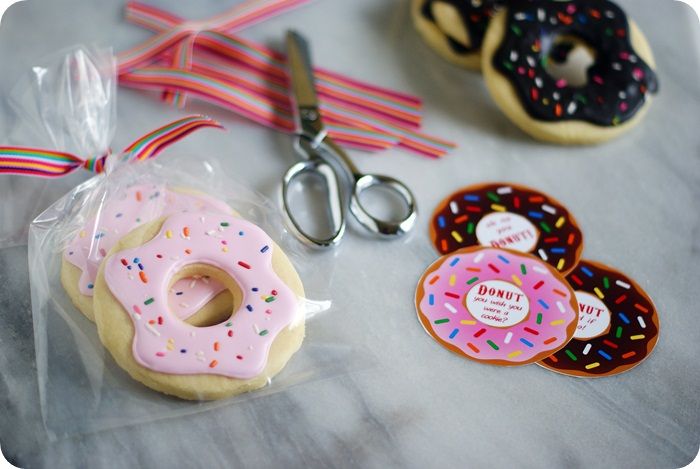
DONUT COOKIES.My uber-creative, beautiful friend Kami from over at
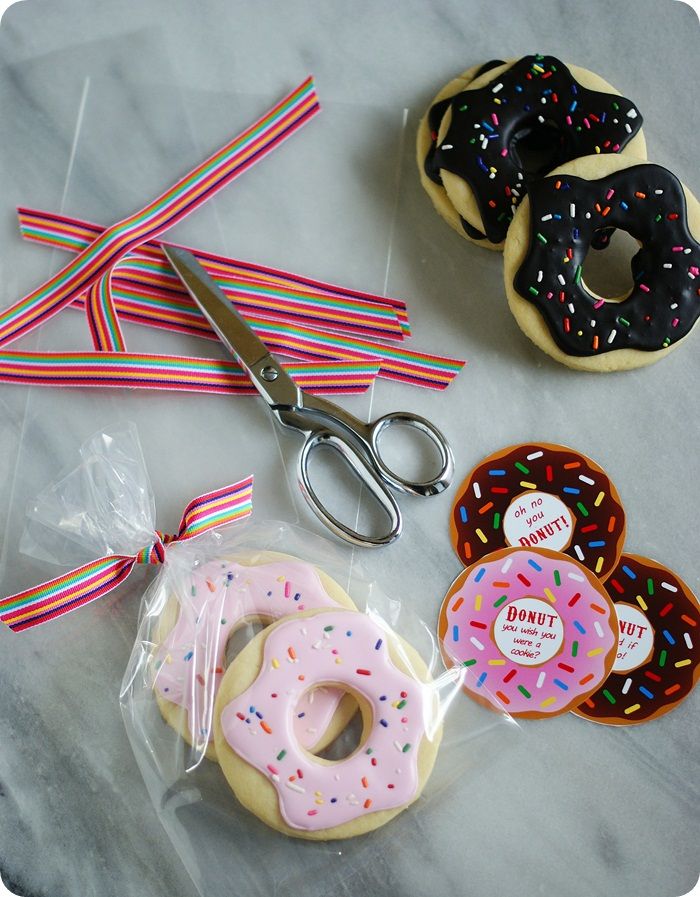
No Biggie & I teamed up to bring you some cookies
and some adorable little bag/box tags and flags to go with them for parties or for gift giving. How cute are they?!? (I love having creative & crafty friends!)
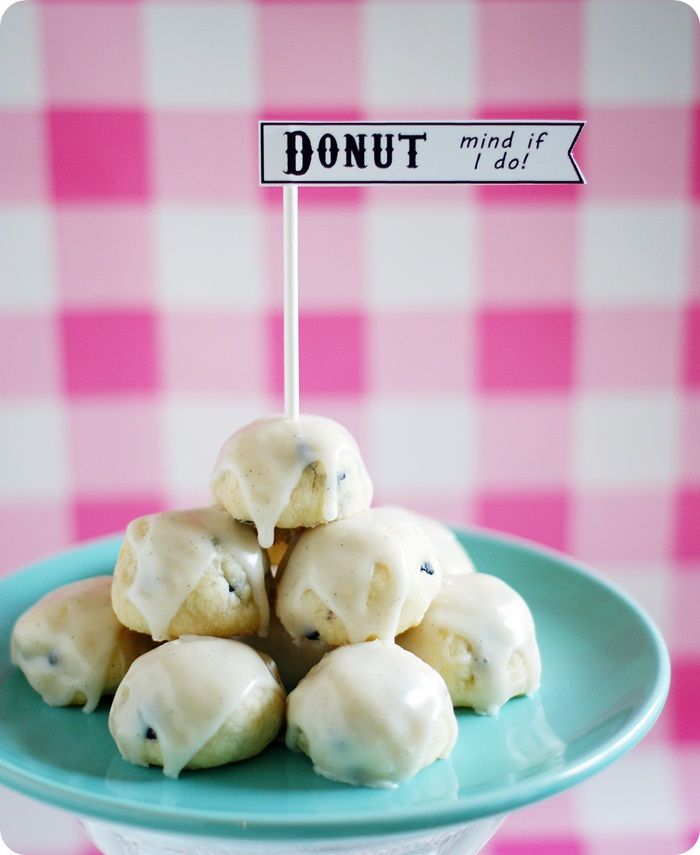
Here's an example of the little flags...you could used them on cookie donut holes or real donut holes:
Um, and how cute does that printable look on a pink bakery box?!? Can you imagine delivering this cuteness to your kid's school, or work, or to your neighbor?
The free printables are over on Kami's blog, No Biggie. (While you're there, click around a bit...if you don't already know Kami, you're going to love her! Check out
these printables she made to go with some little pie cookies at Thanksgiving! Squee!)
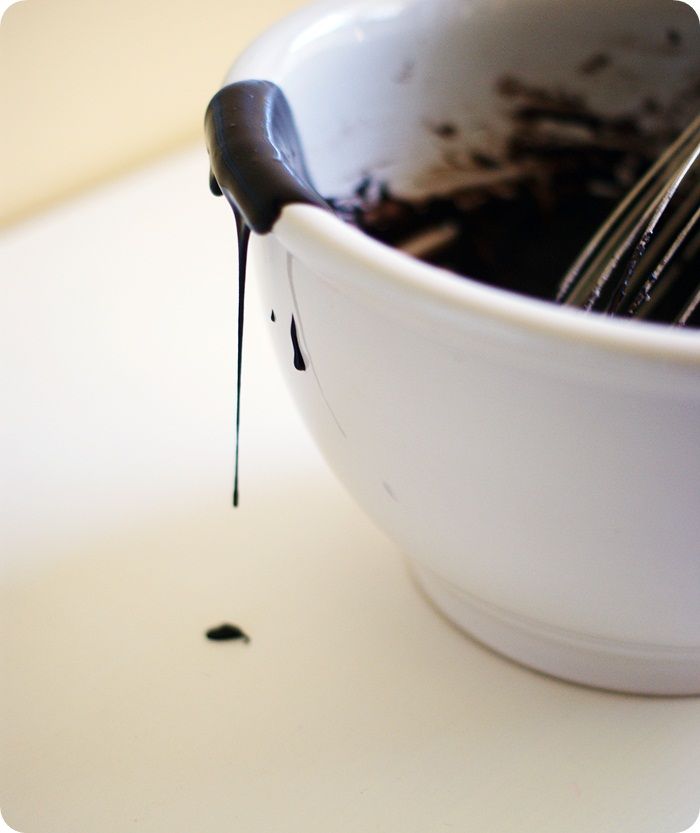
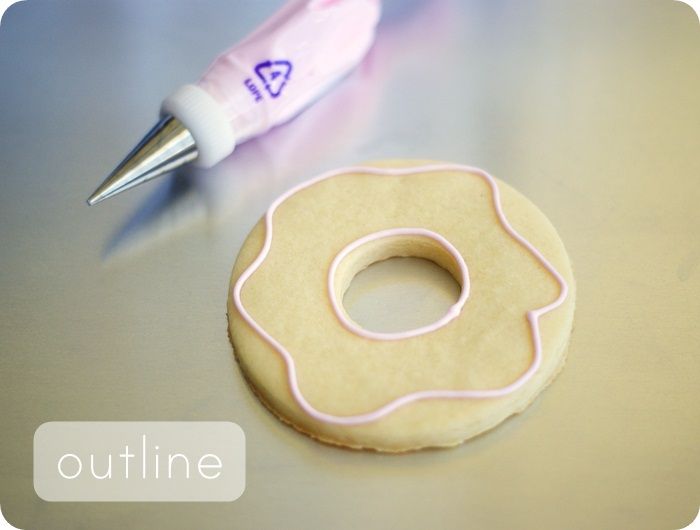
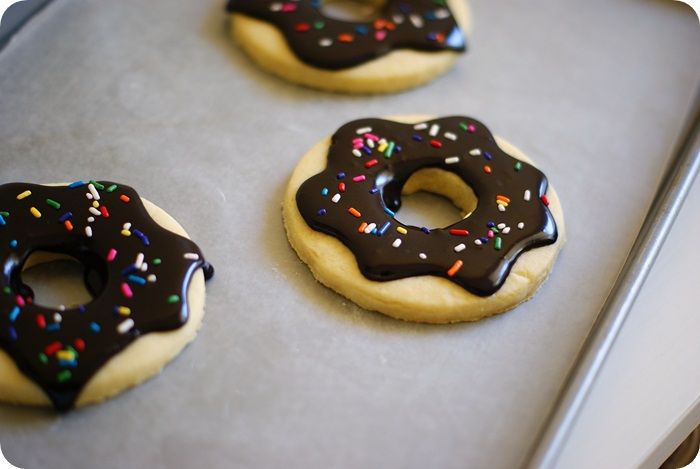
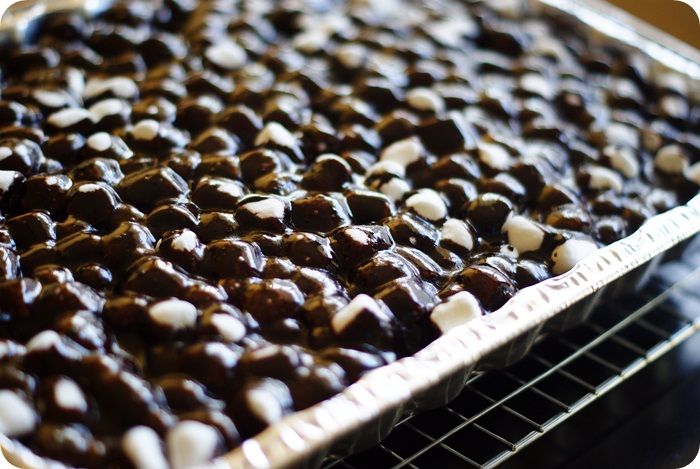
For the donut cookies, I used royal icing for the pink, but really wanted to make a chocolate icing for the chocolate donuts. If you've ever had chocolate royal icing, you'll know that it doesn't really taste, well, chocolatey. So, I made a dark chocolate glaze that sets up shiny and fairly hard, so it's great for packaging.
To make the donut cookies, you'll need:- circle sugar cookies with the center cut out using a smaller cutter or the back of an icing tip
- royal icing, tinted with AmeriColor Deep Pink (or chocolate glaze, recipe follows)
- disposable icing bag
- coupler and #2 tip
- squeeze bottle
- toothpicks
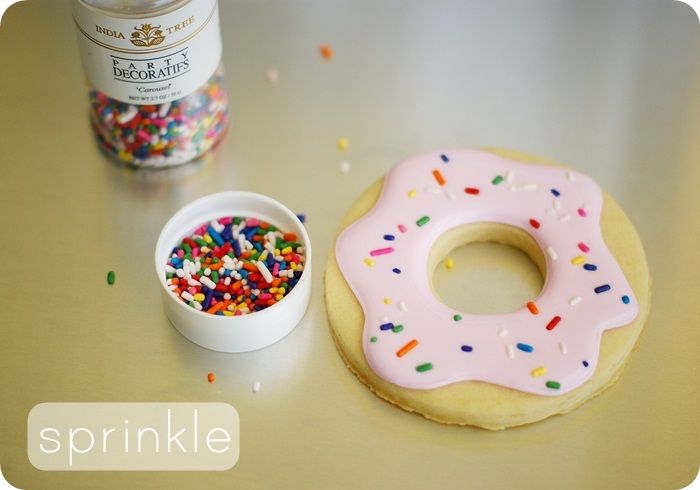
- sprinkles
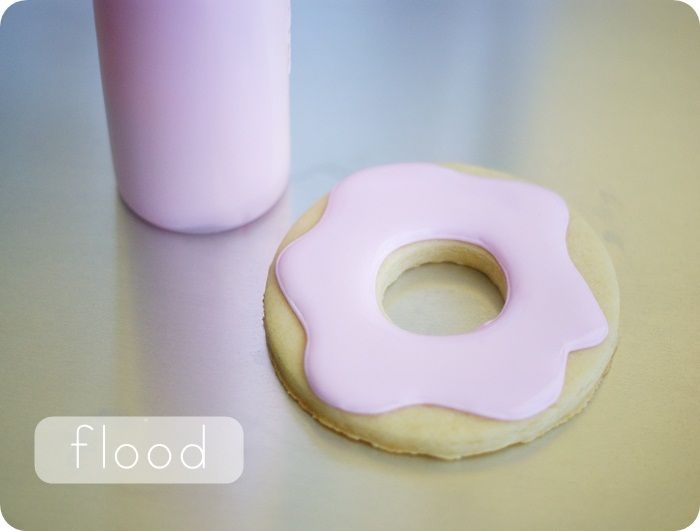
Use a #2 tip to outline a donut icing shape.
Thin the pink icing with water, a bit at a time, stirring with a silicone spatula, until it is the consistency of a thick syrup. (Reserve some of the white icing for piping details later.) You'll want to drop a "ribbon" of icing back into the bowl and have it disappear in a count of "one thousand one, one thousand two." Four is too thick, one is too thin. Count of 2-3 is good. Cover with a damp dishcloth and let sit for several minutes.
Stir gently with a silicone spatula to pop and large air bubbles that have formed. Pour into a squeeze bottle.
Fill in the outlines with the thinned icing, using a toothpick to guide to the edges and to pop large air bubbles.
Scatter on the sprinkles.
Let the cookies dry, uncovered, 6-8 hours or overnight.
{If using the chocolate glaze, you don't have to be so fussy with the thinning. Make the glaze so that it is the consistency of glue. Pipe the outline, then fill with the same consistency glaze. It should all smooth out. Some may run down the inside of the cookie. That's ok.}
 Dark Chocolate Glaze
1/2 cup dutch-process cocoa (such as Hershey's Special Dark)
1 & 3/4 cups powdered sugar
2 TBSP light corn syrup
3 TBSP (or more) milk
Whisk together the cocoa and powdered sugar. Add in the corn syrup and milk; whisk until smooth and the consistency of glue. Add more milk a little at a time, if needed. Use immediately.
The glaze will harden and be stackable in 12-24 hours.
Next up: Blueberry "Cake" Donut Hole Cookies. {This is more of an homage to blueberry cake donuts...they don't taste like the donut, but instead, a blueberry cookie. Look for the very tiny dried blueberries.}
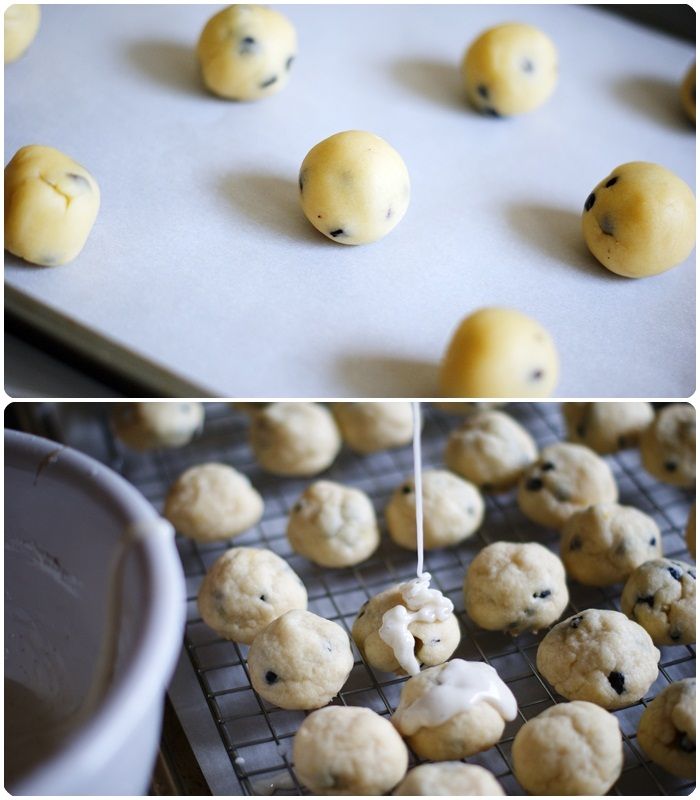 Blueberry "Cake" Donut Hole Cookies
cookies:
2 sticks cold salted butter, cut into chunks
1 cup sugar
2 teaspoons vanilla
1 TBSP milk
3 cups unbleached, all-purpose flour
1/2 cup dried small blueberries
zest of 1 lemon
glaze:
2 & 1/4 cups powdered sugar
2 TBSP light corn syrup
1 teaspoon vanilla bean paste
3 TBSP (or more) milk
Preheat oven to 350. Line 2 cookie sheets with parchment.
Beat the butter and sugar together until creamy. Beat in the vanilla and milk.
Add in the flour, 1 cup at a time, until incorporated. Beat in the blueberries and zest. The mixture will be crumbly, but will hold together if rolled in a ball. Add more milk, bit by bit, it needed.
Use a teaspoon cookie scoop to scoop the dough and roll into balls. Freeze for 5-10 minutes before baking.
Bake for 12 minutes or so...the cookies will look soft, but be lightly browned on the bottom. Remove to a wire rack to cool completely.
When the cookies are cool, make the glaze. Whisk all of the ingredients together until you have a thick, pourable glaze. Spoon over the cookies.
Be sure to hop on over to
No Biggie! I know Kami has some great ideas for using the printables!
Let's hear it...what's your favorite (and least favorite) donut?
{And...do you fall asleep while watching Star Wars?}


.JPG)