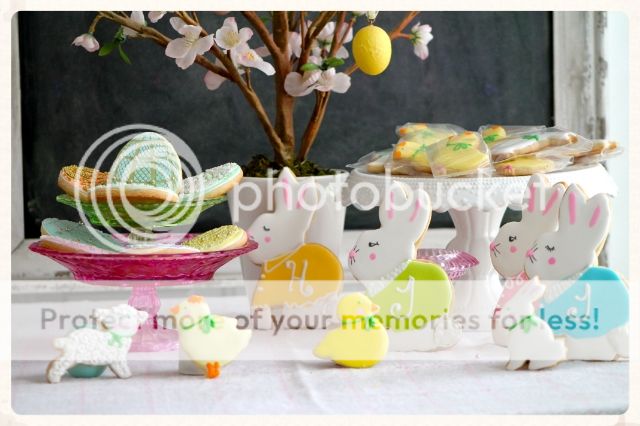
I know you'll want to see all of her Easter creations...like these speckled eggs where she baked the cookies AND the icing!!! These little lambs, sweet bunnies...and oh my gosh...these Faberge Egg cookies!
{Lupita's blog is written mainly in Spanish. Follow the picture tutorials, or do what I do (no thanks to 4 years of high school Spanish), use Google Translate. Just pop the URL into the translate box and Google will translate the ENTIRE post for you. So cool!}
Alright...here's Lupita! Y'all give her a warm welcome!
We are just few days away from Easter, I hope you are already preparing to celebrate this big feast.
I love to decorate my table with cookies as you may imagine and I am always looking for practical ideas or ways to multitask my cookies, and I will share with you how to make a silhouette cookie that if you personalize it it can be a place card for your Easter table.

It is really easy to make and it will add a cute touch to your table.
You will need...
* Your favorite cookie dough (click here for my favorite)
* Square cookie cutter
* Rabbit cookie cutter
* Royal icing medium and flooding consistency
* 2 Pastry bag, couplers and decorating tip #2
* Americolor food gel in Turquoise and Black
* Edible black marker
PROCEDURE:
1) Bake a square cookie and let it cool, prepare a pastry bag with medium consistency white royal icing and tip # 2.
2) Trace the bunny in the center of your cookie using your marker, outline the border of the rabbit and the border of the square with white royal icing.


3) Prepare flooding icing in light turquoise to fill up the square and black for the bunny.
4) Flood the square with turquoise royal icing and let it dry for 6-8 hrs.

5) When the turquoise icing is dry, flood the bunny with black icing and let it dry completely.

6) Prepare some firm medium consistency royal icing in black and fill up a pastry bag and with tip # 2 make some little dots all around the cookie.

7) You can write down the name of each guest on the cookie or just add a little detail that represent each of your guest,for example, you can add some pearls to the Mother Bunny, or some glasses to the Granpa Bunny, or a bow to the Sister Bunny.

What I like the most of decorating cookies is that you have endless posibilites to make your own creations.
Happy Easter Everyone!!
Tidak ada komentar:
Posting Komentar